
Homemade Cosmic Brownies have a fudgy brownie layer topped with a smooth chocolate icing and rainbow sprinkles. They are quick and easy to make, and are the perfect easy brownie recipe!
Hi hi! I am just popping in to share the recipe for homemade cosmic brownies with you! I love making homemade brownies, and once I got a great fudgy brownie recipe nailed, I started to play around with variations of it.
I love having one great back pocket recipe that is super versatile and this brownie recipe is certainly it. You can take the one recipe and make cheesecake brownies, brookies, brownie pie, and now these perfect homemade cosmic brownies!


What are Cosmic Brownies?
I didn't grow up eating cosmic brownies as a kid in New Zealand, but heard about them when I moved to the US. The original Cosmic Brownie is made by a brand called Little Debbie's, who make classic packaged treats. We tried them when we lived in New York and once we moved back to New Zealand I decided I should have a go at making a copycat cosmic brownie!
The original cosmic brownie is a chewy, fudgy brownie, topped with a thin layer of chocolate icing, and rainbow sprinkles. I took my favourite brownie recipe, and baked it in a 9"x13" pan rather than a 9" square, giving a much thinner brownie.
Once the brownie is baked, you add a simple chocolate icing, which comes out nice and smooth as it melts from the heat of the brownie. The whole thing is finished off with rainbow sprinkles, then goes in the fridge to chill until you are ready to serve. Super easy, and super delicious.

How to make Cosmic Brownies
Homemade Cosmic Brownies are super easy to make, and I love that the whole process can be done in one go, rather than having to wait for the brownie to cool before adding the icing.
- Make the brownie layer. This is a super easy brownie recipe, baked in a 9"x13" pan until just done. You don't want to over bake them so that they stay nice and fudgy.
- Make the Icing layer. While the brownie is baking, assemble your icing ingredients. You want to start mixing the icing together once the brownie is out of the oven so that the icing can go on while the brownie is hot. Some recipes use a chocolate ganache made from chocolate and heavy cream, but I went with a super easy icing instead!
- Add the icing. Transfer the icing to the hot brownie, and smooth out. The heat from the brownie will melt the icing, making it nice and smooth and flat.
- Add sprinkles. Add your sprinkles of choice to the top of the brownie.
- Refrigerate. This part is important - it is important both for letting the icing set but also allowing the brownie to chill down to be that perfect fudgy, chewy texture and rich chocolate flavor.
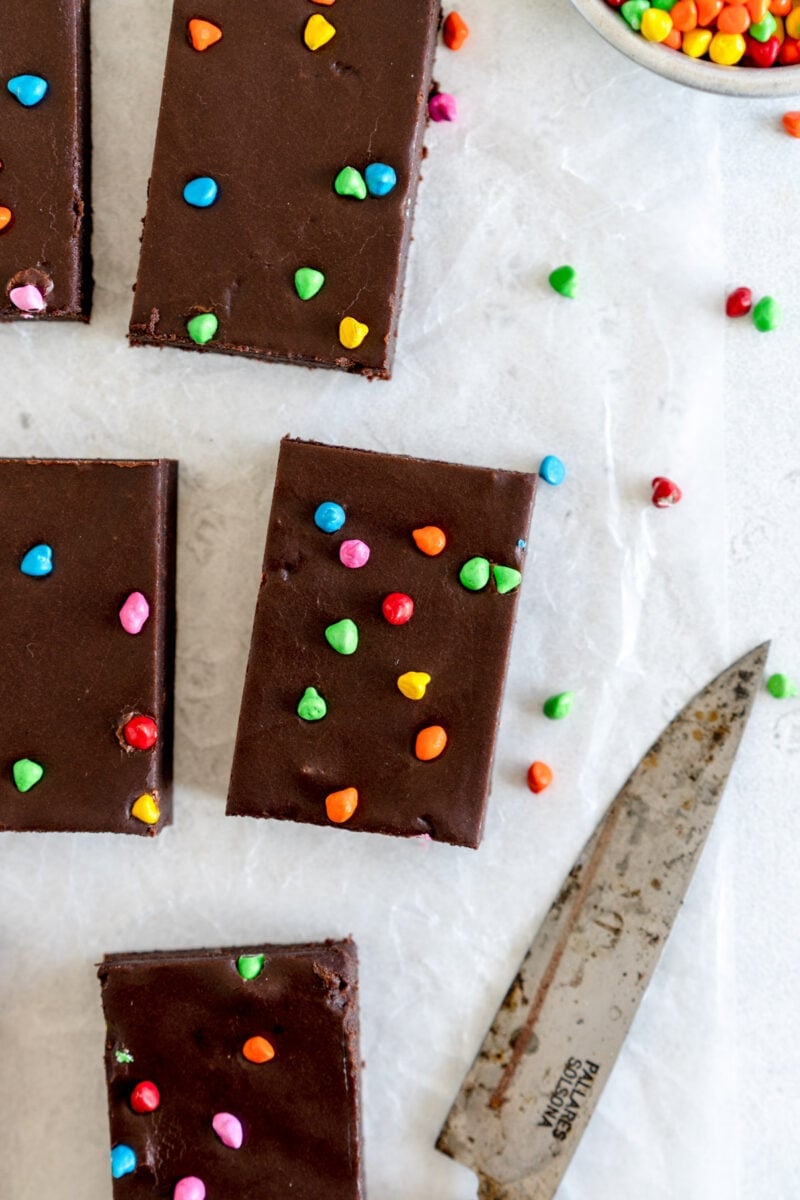
- Slice and enjoy! Remove the brownie from the pan and cut into pieces using a super sharp knife.
For all my tips and tricks on perfect fudgy brownies, check out my super easy brownie recipe

How to Cut Brownies Cleanly
Here are a few top tips to make sure you get a perfect cut on your brownie:
- Make sure the brownies are properly chilled. I usually do overnight, but a few hours minimum is best to make sure that both the brownie and the chocolate frosting are set.
- Use a super sharp knife. This is important for getting a clean cut on anything.
- Cut in one motion - I use a knife with a large blade and push down evenly rather than levering the knife down.
- Wipe the blade between cuts. I don't use a warmed blade, but if needed I do rinse it and dry well between cuts.
Cosmic Brownie Sprinkles
The original Little Debbie's Cosmic Brownie has rainbow candies on the top that are basically candy coated chocolate chips.
I looked all over for these to find somewhere that ships them to New Zealand, and ended up getting them from a place in Australia. You could also use these rainbow bit chips from Sweetapolita, or you may be able to find them at craft stores. You could also use mini M&M, or the sprinkles of your choice!
How to avoid crinkly icing on your cosmic brownies
This is a strange thing to write a paragraph about, but I know a lot of you love attention to detail as much as I do. When I was testing this cosmic brownie recipe, I was having problems with the icing cracking as it cooled, or as I pulled the brownies out of the pan. There were a few reasons for this, and this is how I fixed them:
- The frosting was going on when the brownies were hot from the oven, causing the middle of the brownie to sink and the icing to crack when it cooled. Leaving them to sit for about 5 minutes meant that the brownie has time to set a little before the frosting goes on.
- The sprinkles were going on when the icing had just gone on, and so they sunk and made cracks. Leaving the icing to sit for 1-2 minutes after smoothing it on means the sprinkles sit on the surface.
- When I was testing, as I usually do, I was greasing the pan before adding the parchment paper to help the paper not wiggle when the brownie batter is added. This meant that when the cosmic brownies were chilled, it was hard to remove the paper from the pan, causing the icing to crack. Using an ungreased pan and parchment paper helped to fix this!

Frequently Asked Questions
What tools and equipment do you use?
You can find a full list of the tools and equipment I use on my products page
How do you store Cosmic Brownies?
Store cosmic brownies in an airtight container in the refrigerator for up to five days.
Can these be made gluten free?
I haven't tested it specifically but brownies generally are ok being made with a cup for cup gluten free flour replacement.
Can you freeze brownies?
I haven't tested freezing these brownies in particular, but if I was going to I would leave off the sprinkles, and place them in an airtight container in the freezer, then defrost either in the fridge or at room temperature.

For more Brownie Recipes, check out:


Made this recipe and love it?
If you made this recipe then I would LOVE for you to leave me a review below to let me know how you liked it! Also, please make sure to tag me on Instagram if you make it!
A note on salt and oven temperature
It is important to note the type of salt that is called for in a recipe. I use Diamond Crystal salt throughout my recipes - if you use a different sort of kosher salt or regular table salt you will need to adjust accordingly as some salt is 'saltier' than others. Morton's salt is twice as salty, so you will need half the quantity. Same goes for a regular table salt. I am working to get gram measurements throughout my recipes for salt but still getting there.
All oven temperatures are conventional unless otherwise stated. If you are baking on fan / convection, you will need to adjust the temperature. An oven thermometer is a great investment to ensure that your oven is the correct temperature.
Using the double / triple function in the recipe card
You will notice that there is a '1X' '2X' '3X' button in my recipe card. This can be used for doubling or tripling a recipe. However, please note that this only doubles the ingredient quantities in the ingredients list and NOT in the method. If there are quantities or pan sizes in the method of the recipe (for example weigh out 150g brown butter), you will need to scale this number manually. It will also not change the baking time in the recipe so you will need to adjust this yourself too. It is always a good idea to read through a recipe fully before doubling it just to check this. If you would like to scale this recipe or convert for another pan size, use my calculator!
Tools and equipment
For a list of my go-to tools and equipment, I have a post you can refer to here.
Why is this recipe in grams?
I post my recipes in grams as it is the most accurate way to bake. Cups are not only inaccurate but they vary in volume worldwide. There is no way for me to provide one cup measure that works for everyone. However, posting in weight fixes this issue. If you would like the recipe in cups you are welcome to convert it yourself via google, but please do not ask me to do it for you as I am not comfortable providing a recipe using a method that I have not tested. Baking with a scale is easy, accurate, and also makes cleanup super simple. Here is the scale that I use if you would like a recommendation! Here's to accurate baking!
Print
Cosmic Brownies
- Author: Erin Clarkson
-
 Prep Time: 20 minutes
 -
Cook Time: 20 minutes
-
Total Time: 40 minutes
-
 Yield: 16 servings
 -
 Category: Brownies
 -
 Method: baking
 -
 Cuisine: american
Description
Homemade Cosmic Brownies have a fudgy brownie layer topped with a smooth chocolate icing and rainbow sprinkles. They are quick and easy to make, and are the perfect easy brownie recipe!
Ingredients
Brownie
- 200g dark chocolate (I used 72%), coarsely chopped
- 180g unsalted butter, cold from the fridge is fine
- 15g dutch process cocoa powder, or regular unsweetened cocoa, sifted
- 3 large eggs (about 150g not including shells), at room temperature
- 200g caster sugar
- 100g light or dark brown sugar
- 2g (½ tsp) kosher salt
- ½ tsp vanilla extract or vanilla bean paste
- 100g all-purpose flour, sifted
Chocolate Icing
- 250g powdered sugar, sifted
- 25g cocoa powder (regular or Dutch Process is fine)
- pinch of salt
- 60g unsalted butter, cut into small pieces, at room temperature
- 40g boiling water
Rainbow Sprinkles of your choice to finish
Instructions
BROWNIE
- Preheat the oven to 350°f / 180°c. Line a 9”x13" (20cm x 30cm) pan with parchment paper, leaving a little extending up the sides of the pan to help remove the brownie.
- In a heatproof bowl over a pan of simmering water (make sure the bowl does not touch the water), combine the dark chocolate and butter. Heat, stirring frequently, until the chocolate and butter are melted and the mixture is smooth. Alternatively you can do this step in the microwave-safe bowl - microwave for 30 second increments, stirring well after each until the mixture is smooth and combined.
- Sift the cocoa powder over top of the chocolate and butter mixture and stir until well combined.
- In a large bowl, combine the eggs, granulated sugar, and brown sugar. Mix on medium to high speed with an electric handheld mixer for 2-3 minutes until the mixture has lightened and increased in volume. This step can also be done in a stand mixer using the whisk attachment.
- Add the chocolate mixture and mix to combine. Add the salt and vanilla and mix until incorporated.
- Add the flour and incorporate by hand until the mixture is smooth and does not have any lumps.
- Transfer the batter to the prepared pan, and tap the pan on the counter a few times to ensure there are no air bubbles. Leave to sit for a minute or two then bang again to ensure there are no bubbles.
- Bake the brownies for 18 to 20 minutes, checking after 15. You are looking for the edges and top of the brownie to be set, and when a skewer is inserted into the middle, it should come out with a few moist crumbs attached. You are best to lean toward under baking than over baking. While the brownie is baking, prepare the icing ingredients so you are ready to start making it when the brownie comes out of the oven.
- Remove the brownie from the oven and leave to stand for 5 minutes before starting making the icing.
CHOCOLATE ICING
- Sift together the powdered sugar, cocoa powder, and salt. Add the butter and mix until the butter is coated by the dry ingredients.
- Once the brownie has sat for 5 minutes, add the boiling water to the icing ingredients, and mix until the butter is melted and the icing is evenly combined. I like to start with a spatula and switch to a whisk to help the icing come together.
- Add the icing to the hot brownie, then carefully use an offset spatula or the back of a spoon to smooth the icing down. The heat from the brownie will melt the icing, helping it to smooth out.
- Once the icing is smooth, leave it to stand for 1-2 minutes, then add the sprinkles of your choice.
- Place the cosmic brownies in the fridge until completely chilled, a few hours or up to overnight.
- Remove from the pan using the parchment and slice into pieces using a sharp knife.
- Store in an airtight container in the fridge for up to 5 days.
Keywords: brownies, cosmic brownie, brownie recipe
The post Homemade Cosmic Brownies appeared first on Cloudy Kitchen.


