
This Easy Apple Pie has a flaky homemade pie crust and a cooked apple pie filling. It is a pie made in a tart pan, which makes assembly neat and easy. This apple pie with a precooked filling can be made ahead of time and stores well.

Table of contents
- Easy Apple Pie
- How to make pie in a tart pan
- Tips for easy to work with pie dough
- Precooked apple pie filling
- How to lattice a pie
- Best apples to use for apple pie
- How to avoid a soggy bottom crust on a pie
- How to reheat a pie
- Freezing Pie Dough
- FAQ for Apple Pie
- For more pie recipes, check out:
- Recipe For Easy Apple Pie
Easy Apple Pie
Hi hi! Just popping in (the day before thanksgiving sorryyyy) to share the recipe for this super easy apple pie! I had some leftover filling from making these hand pies, and some pie dough in the freezer, so I figured I might as well go for it.
This is a super easy apple pie - making it in a tart pan means that there is no need to worry about a top crimp, and you get an amazing crust to filling ratio. This apple pie has an easy homemade pie crust, and a precooked apple pie filling.


How to make pie in a tart pan
I used a removable bottom tart pan to make this apple pie - rather than a more standard pie pan. I love using a tart pan for a few reasons:
- It is super easy to get nice clean edges on a tart pan. Instead of trimming like a pie crust, you can just press the pie crust against the sharp edge of the tart pan and it cuts away cleanly.
- A tart pan gives a great crust to filling ratio. A tart pan is shallower than a pie pan, so you get a thinner layer of filling to go with the flaky lattice pie topping.
- Removing this apple pie from the pan is super easy. My favourite way to remove a tart from a pan like this is to use a bowl. Turn the bowl upside down, and then press the tart down onto it. The outside ring will drop off, leaving the tart on the base. You can either slide the crostata off, or serve on the base.
If you would like to make this in a pie dish it should work just fine. Just work out the capacity of your pie pan compared to the tart pan and scale accordingly for the filling. The crust recipe will stay the same.

Tips for easy to work with pie dough
I use a little tip that my baking bestie Erin Mcdowell taught me - to laminate my pie dough after making it but before rolling it out for use. What this does it pops a few layers within the pie dough. This makes it homogenous and easy to work with but also still nice and flaky. So you get the best of both worlds - flaky AF pie dough which is super easy to work with. Here's how you do this:
- Make your pie dough - For this recipe I make the dough then form it into a rectangle. Then I wrap tightly in plastic and chill for only an hour. This gives the butter time to chill down enough that it won't melt everywhere when you roll it out.
- Roll out and perform turn 1 - Roll the dough into a large rectangle on a lightly floured surface. Then brush off any excess flour and perform a letter fold - where you fold it like a business letter.
- Perform turns 2 and 3 - Repeat the process again two more times. Your dough should be super homogenous at this point!
- Divide and shape - At this point I split the dough in two and shape each into a disc rather than roll out and laminate each piece individually. Works much better. If you're using it for a lattice top, shape into a rectangle. Starting with the shape you are wanting to achieve makes rolling out much easier!
- Chill again - Either chill your dough for at least 2 hours or overnight, or freeze for another time.

Precooked apple pie filling
This apple pie use a precooked apple pie filling, which I borrowed from this apple butterscotch pie that comes from Erin's Pie Book (I used the exact same one for my apple hand pies) Using a precooked filling is super beneficial for a few reasons. It takes the guesswork out of the filling. By precooking your filling, you know how thick it is going to be before it goes into the oven, so you don't have to worry about it not thickening up enough in the oven.
The precooking of the apple means that the filling is easy to work with, and means you don't have to worry about the fruit cooking properly in the oven. The precooked filling is super easy to make:
- Combine melted butter, apples, brown sugar, cinnamon and salt in a pan and cook until the sugar and butter have melted and the apples have started to soften.
- While that is cooking, combine the flour and sugar in a bowl. This removes any lumps from the flour to prevent any lumps in your filling.
- Add the flour mixture to the pot and cook until it thickens.
- Transfer to a pan and leave to cool until you are ready to assemble. To cool it down fast, spread it onto a sheet pan, which increases the surface area and helps it to cool quickly.

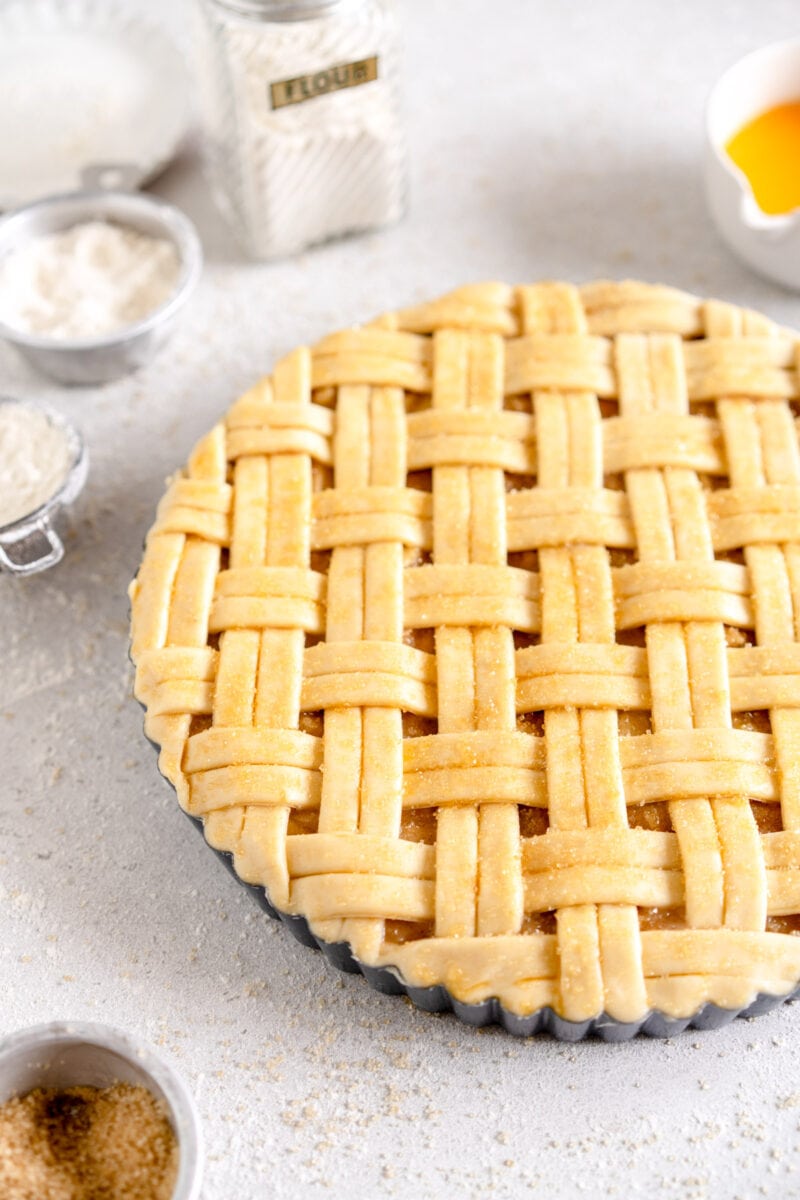
How to lattice a pie
I finished this Apple Pie with a simple lattice top, but just doubled up on the strips and treated each pair of strips as one. Lattice on pies are super simple to do, you just follow the pattern:
- Lay out all the vertical strips on the pie filling. Make sure that the spacing is even between them. This will form your foundation.
- Lift every second strip up and fold it back - so strips 1,3,5,7 etc.
- Place a strip of pie dough down and carefully unfold the strips and place them back down.
- Fold back every strip again but starting with the alternate set of strips - so lift up strips 2,4,6,8 etc and fold them back.
- Place another strip of pie dough and reset your strips.
- Repeat the process, alternating which strips you fold back. I like to start in the middle and work my way down, and then start in the middle and work my way toward the top of the pie.
Use the longest strips in the middle of the pie. You can use shorter strips as you get closer to the edges of the pie. If you have any strips which have messy parts on them, arrange them so that the mess part is covered by another strip of pie dough (if you like, messy parts on pies are also fine!)
See the video below for a visual guide on how to lattice a pie.


Best apples to use for apple pie
I like to use a mixture of apples when I make apple pie - differing textures and flavours. For this easy apple pie I used braeburn and granny smith. I prefer to peel my apples, but you are welcome to leave the skins on if you like!
How to avoid a soggy bottom crust on a pie
The most important step in avoiding a soggy bottom on a pie is getting a super solid bake on it. This means baking the pie until it is very golden brown, in order to ensure that the crust is fully cooked on the bottom.
If your top crust is browning too quickly, as soon as it has reached your desired level of golden brown, cover the pan with foil. This stops the crust from browning any further, but gives the bottom of the pie some time to bake up properly and to get crisp and golden brown.
This pie does not need a blind bake. If you were to blind bake it, you would have a hard time sealing the top crust to the bottom one. Don't be afraid to bake until very golden brown - all that colour is flavour.
If you have added sugar to the top of your pie and then you add foil, it may come out a tiny bit moist on the top of the crust in the oven - just take off the foil and pop it back into the oven quickly to crisp up again.
I gave this pie a good 1 hour 10 minutes in the oven - 20 minutes at a higher temperature then 50 minutes at a lower temperature and it was very golden brown. You can do less if you like, but it is really important to get that solid bake on the crust in order for it to be sturdy.


How to reheat a pie
If you make a pie ahead of time, you can reheat in a 350°f / 180°c oven. Just pop it in there for 15-20 minutes. Cover with foil if needed to stop any further browning.
You are just looking to reheat the filling slightly and re-crisp the crust a little.
Freezing Pie Dough
I am lazy (or I am efficient?) and prefer to make all my pie dough in one go so I only destroy the kitchen once. Making a whole bunch of dough only takes a tiny bit longer than one or two batches, so I just get it all done.
I get the dough up to the point where I have performed the folds and shaped it into a disc, then I wrap it well and throw it into the freezer. It can keep for up to 3 months - if you're worried, wrap it then pop it into a ziploc bag just for double protection against the freezer smell.

FAQ for Apple Pie
- What tools and equipment do you use?
You can see a full list of all the tools I use here - Which pan did you use?
I used a removable bottom tart pan. - Can this be made ahead?
I always make my pie dough ahead, and the apple filling can be made ahead too and stored until ready to use. Make sure that you cool it uncovered as if you cover it, the moisture can make the filling a little loose. - What can I use instead of turbinado sugar on the top?
You can just leave it off - regular sugar will burn.

For more pie recipes, check out:
Made this recipe and love it?
If you made this recipe then I would LOVE for you to leave me a review below to let me know how you liked it! Also, please make sure to tag me on Instagram if you make it!
A note on salt and oven temperature
It is important to note the type of salt that is called for in a recipe. I use Diamond Crystal salt throughout my recipes - if you use a different sort of kosher salt or regular table salt you will need to adjust accordingly as some salt is 'saltier' than others. Morton's salt is twice as salty, so you will need half the quantity. Same goes for a regular table salt. I am working to get gram measurements throughout my recipes for salt but still getting there.
All oven temperatures are conventional unless otherwise stated. If you are baking on fan / convection, you will need to adjust the temperature. An oven thermometer is a great investment to ensure that your oven is the correct temperature.
Using the double / triple function in the recipe card
You will notice that there is a '1X' '2X' '3X' button in my recipe card. This can be used for doubling or tripling a recipe. However, please note that this only doubles the ingredient quantities in the ingredients list and NOT in the method. If there are quantities or pan sizes in the method of the recipe (for example weigh out 150g brown butter), you will need to scale this number manually. It will also not change the baking time in the recipe so you will need to adjust this yourself too. It is always a good idea to read through a recipe fully before doubling it just to check this. If you would like to scale this recipe or convert for another pan size, use my calculator!
Tools and equipment
For a list of my go-to tools and equipment, I have a post you can refer to here.
Why is this recipe in grams?
I post my recipes in grams as it is the most accurate way to bake. Cups are not only inaccurate but they vary in volume worldwide. There is no way for me to provide one cup measure that works for everyone. However, posting in weight fixes this issue. If you would like the recipe in cups you are welcome to convert it yourself via google, but please do not ask me to do it for you as I am not comfortable providing a recipe using a method that I have not tested. Baking with a scale is easy, accurate, and also makes cleanup super simple. Here is the scale that I use if you would like a recommendation! Here's to accurate baking!
Recipe For Easy Apple Pie
Print
Easy Apple Pie
- Author: Erin Clarkson
-
 Prep Time: 1 hour
 -
Cook Time: 1 hour 30
-
Total Time: 3 hours
-
 Yield: One 9" pie
 -
 Category: Pie
 -
 Method: Baking
 -
 Cuisine: American
Description
Apple Pie has a flaky homemade pie crust and a cooked apple pie filling. It is a pie made in a tart pan, which makes assembly neat and easy. This apple pie with a precooked filling can be made ahead of time and stores well.
Ingredients
Pie Dough
- 375g all-purpose flour
- Pinch of Salt
- 2 tsp (8g) sugar
- 225g cold unsalted butter, cut into cubes
- 240g cold water
- 1 cup ice
- 60g Apple cider vinegar
Apple Filling
- 60g unsalted butter
- 800g peeled and diced apple (weight is of diced apple, not whole fruit)
- 1 tsp vanilla extract
- 200g light or dark brown sugar
- 1 tsp ground cinnamon
- pinch of salt
- 60g granulated sugar
- 55g all-purpose flour
Instructions
PIE CRUST
- Place flour, sugar and salt into a large bowl. Cut butter into chunks, and add to the flour. Toss lightly to coat.
- Working quickly, using a pastry blender or your fingers, cut the butter into the flour mixture until there are only large pea-sized chunks left. You want a few lumps of butter remaining to keep the pastry nice and tender.
- Combine ice, water and cider vinegar in a bowl. Sprinkle a few tablespoons of the ice water into the flour and butter mixture, and using a stiff spatula or your hands, mix in well. Continue adding water a tablespoon at a time ( I usually start with about 120g liquid, mix that in, then go from there and add additional liquid as needed) until you have a dough that holds together well, but is not too wet.
- Squeeze together with your fingertips to make a homogenous dough. Shape into a rectangle, Rest in the fridge for one hour.
- Roll out the dough on a floured surface into a rectangle, fold it in thirds like a letter, then roll again and repeat the folding. Repeat this process one more time for a total of three folds. Divide the dough into two pieces, and shape one into a disc by folding the edges under. Shape the other into a rectangle (this will be used for your lattice). Rewrap tightly in plastic, and rest for at least two hours, or preferably overnight, before using.
APPLE FILLING
- Place the butter into a medium pan. Add the apple, vanilla, brown sugar, cinnamon and salt, and cook over medium heat, stirring frequently, until the butter and sugar has melted. Continue to cook for 3-4 minutes until the apple has softened slightly.
- Combine the sugar and flour in a bowl. Add to the apple mixture and cook, stirring constantly, until the mixture has thickened up.
- Transfer to a sheet pan and leave to cool uncovered at room temperature.
ASSEMBLY AND BAKING
- Unwrap the disc of pie dough and place onto a lightly floured surface. Roll the dough out, turning the dough 45˚ often as you are rolling to keep it even. You want the circle to be slightly larger than your pan. Transfer to a 9” loose bottomed tart pan,, and arrange to ensure that the dough is well settled. Leave the overhang settled over the edge of the pan. Place into the fridge while you roll out the second piece of crust for the lattice.
- Take the rectangle of dough and roll out into a large rectangle approximately the same thickness as the base. The dimensions aren’t super important here but in order to maximise dough, keep one edge of it to just over 9” (so that you don’t have too many long strips hanging over the edge of your pie and wasting dough).
- Using a pastry wheel and a ruler, cut strips of pie dough to your desired thickness. I made quite thick strips for this one. Place on a baking sheet lined with parchment paper. Place in the fridge until you are ready to use.
- Transfer the filling to the lined tart pan, smoothing to make sure it is nice and even.
- Remove the pan with the lattice strips from the fridge and lattice the pie as desired. For this apple pie I made a regular lattice, using two thin strips to make one larger strip. To set this up you lay a set of horizontal strips across the pie, then for the second set of strips, you place them at a 90 degree angle. (See video for explanation). If you run out of strips you can trim any overhanging, press together, re roll and chill for 5-10 minutes and cut yourself some more.
- Once you have finished your lattice, carefully trim the outside edge so that is is flush with the side of the tart tin. To do this I usually just use the sharp edge of the tin and press against it to cut the pie dough cleanly (only do this if you have a tart tin with the sharper edges, otherwise you can fold excess under and crimp, or if you are using a pie pan, just trim the edges and press down to seal.
- Place the finished pie in the fridge to chill for at least 30 minutes. While it is chilling, preheat the oven to 425°f / 220°c, and arrange a baking rack in the bottom third and middle third of the oven.
- When you are ready to bake the pie, brush the top well with egg wash, and sprinkle with turbinado sugar. Place on a baking sheet and place on the lower rack, and bake for 20 minutes, until the pastry is turning golden brown and looks set. Then, reduce the oven temperature to 375°f / 190°c, move the baking sheet with the crostata on it to the middle rack, and bake for a further 40 to 50 minutes, until the pastry is deep golden brown and the filling is bubbling. Tent the top with foil at any time if you are worried it is browning too quickly. It is important you get a good bake on a fruit pie. If you don't you run the risk of a soggy bottom, so make sure it is very well baked.
- Remove the baked pie from the oven and allow to cool before removing from the pan and slicing with a sharp knife. Serve slightly warm or at room temperature.
- Store leftovers lightly covered at room temperature.
Notes
Apple filling from 'the book on pie' by Erin McDowell
Keywords: Pie, Apple Pie, Thanksgiving, apple pie tart
The post Easy Apple Pie appeared first on Cloudy Kitchen.


