
This super easy brownie cookie recipe is all the best parts of a chocolate brownie, but in cookie form - fudgy brownie, crinkly brownie top, and crisp edges. Chocolate brownie cookies come together quickly and bake in only 10 minutes!

Hi hi! I am just popping in to share this brownie cookie recipe! I am super proud of this one - I have been a baking blogger for nearly 6 years now, and can't believe I still didn't have a recipe for brownie cookies, so here we are!
These chocolate brownie cookies are all the parts that I love about a brownie, but in a cookie form - perfect cookie brownies! They are rich and fudgy, with that perfect crinkly brownie top - basically fudge cookies. They are super easy to make - it was important to me to try and avoid a chill time if at all possible, so they come together in about 25 minutes!
My brownie cookie recipe makes 8 chocolate cookies - it can easily be doubled if you need more, or you can scale back the size too if you would like.
These are definitely an epic addition to my homemade cookie recipe collection - I love them so much and I hope you do too! If you want to really amp these up, these brownie cookies are also AMAZING finished with my quick brownie frosting recipe


Ingredients in Brownie Cookies
The ingredients for these brownie cookies are super simple and are basically the same as a regular classic brownie recipe, but the ratios are what make them the perfect brownie cookies:
- Chocolate. I used 72% dark chocolate, which gives an amazing richness to the brownie cookies. I used the brand Whittakers, but anything dark that you would be fine eating on its own works here - make sure it is a good quality one as it is the main chocolate flavor you taste.
- Butter. Unsalted butter is my go-to but I have also made these with salted butter and just reduced the salt in the recipe slightly.
- Cocoa. I initially tested this brownie cookie recipe just with Dutch process cocoa, then added in half black cocoa to help bump the chocolate flavour. If you only have Dutch, this will work fine!
- Egg. The size of the egg is quite important here as it helps to bind the brownie cookies and whip with the sugar to give that crinkly brownie top. My eggs usually weigh 50g without the shell. I always use large eggs in my baking.
- Sugar. I use both caster sugar (white sugar) and brown sugar in my brownie cookies, for both texture and spread. There are more notes further down on caster sugar vs granulated!
- Flour. These brownie cookies only make eight cookies, so we only use a small amount of flour. I prefer all purpose flour.
- Salt. Don't ever forget to salt your sweets, especially with chocolate!

The testing journey
I always take super super detailed notes when I test recipes, and love sharing the process over on my Instagram. Baking is definitely a science, and it often takes multiple tests to get to the point where a recipe is ready to shoot and put on my website. Here is how I got to this point:
- First Test. I took my regular fudgy brownie recipe, made it as written, but I added in baking powder along with the flour. I tested standing the recipe at room temperature, and several chill times in the fridge before baking. The batter was super hard to handle and the texture came out too cakey for me, along with a very strange looking crinkly texture on the top - not the beautiful shiny cookie I was after.
- Second Test. I increased the chocolate quantity slightly, thinking that would make them fudgier, and also increased the cocoa quantity. I left the chocolate and cocoa mixture to stand for 10 minutes before adding to the egg mixture, which I whipped for longer. I was trying to achieve that perfect crackly thin crust that brownies have, along with fixing the texture. This test came out super cakey - however I have filed the recipe away for a chocolate whoopie pie as they will be perfect for this!
- Third and fourth test. I ditched the baking powder for these tests, so they are now just blobs of brownie batter on a pan (truly the dream). I increased the butter and chocolate quantities from my original recipe to help with fudginess, and again left the chocolate and cocoa to sit before adding in to the egg mixture. I played around with different bake temperatures and chill times for these cookies. I was getting close, but I still found that they weren't coming out how I wanted them - they were lifting strangely off the paper, and they weren't spreading how I would have liked them to.
- Fifth test. To help with spreading, I increased the portion size of each cookie. Sometimes having more batter means that they spread more nicely on the pan, and in this case, that worked great. However, I went too far in the other direction and they spread too much.
- Sixth Test. This was where I got to where the recipe is - I increased the brown sugar and the flour just a touch (you can see I only changed it by 10g), and swapped out some of the cocoa for black cocoa to help with richness. These came out perfectly, but they weren't where I wanted them aesthetically. I was using a cookie scoop, which was hard to get a looser batter evenly scooped.
- Seventh Test. This was purely an aesthetic tweak - changing from scooping the batter onto the paper using a cookie scoop to piping it on using a piping bag. This worked out perfectly, and gave me 8 beautifully round cookies, and the brownie cookie recipe I have for you today!


How to make Brownie Cookies
Now that I have run you through my full testing situation, here is how to make the best brownie cookies:
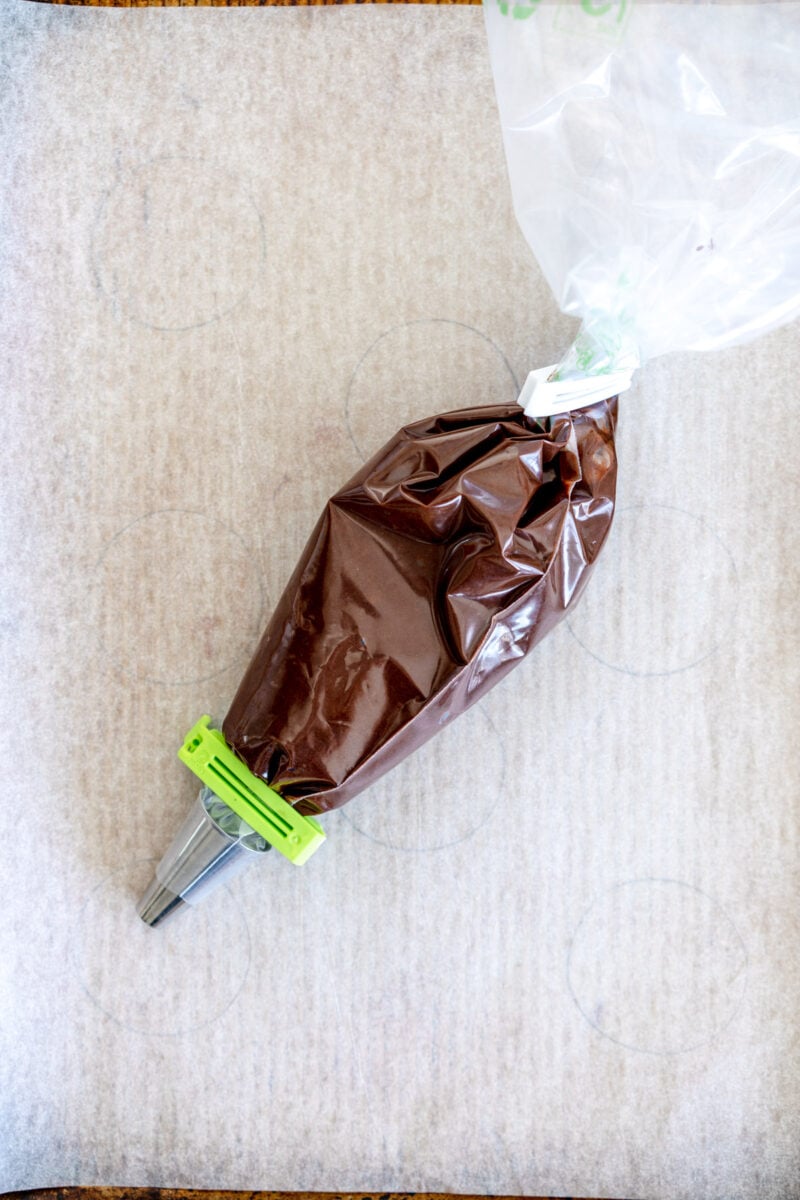
- Make a template. The easiest way to get your brownie cookies perfectly round is to pipe them - I like to draw myself a template on some parchment paper first and then prepare my piping bag.
- Melt together butter and chocolate. I find it easiest to do this step in the microwave - I melt them together in a heat safe bowl for 30 seconds, give the mixture a stir, then do another 10 seconds if needed. This can also be done over a pan of simmering water as a double boiler.
- Add the cocoa. Adding cocoa to a hot melted chocolate mixture gives the cocoa powder a chance to bloom, which increases that rich chocolate flavour. Once the cocoa is in the chocolate mixture, set a timer for eight minutes.
- Mix up the eggs and sugar. Whip the eggs and sugar super well (set a timer for this too), so that they are thick and fluffy. This is really important for getting the crinkle top on the brownie cookies. I use an electric hand mixer to make these cookies, but you can do it in a stand mixer with the whisk attachment if you like.
- Add the chocolate mixture. I mix this in with my hand mixer.
- Add the flour and salt. I prefer to incorporate dry ingredients by hand when I am making brownies or brownie cookies to ensure that I do not overmix.
- Pipe out the cookies. Pipe the cookies onto the parchment paper template. You don't have to get them perfect first time. You can go back and add more batter if needed.
- Bake cookies. Bake the brownie cookies for 10 minutes until the tops are crackly and they are just set. Leave to cool on the pan before serving.
These brownie cookies are amazing frosted too and can be made super cute with sprinkles - use my easy brownie frosting recipe and finish as you like - with cosmic brownie sprinkles, a few Easter eggs, themed sprinkles - the list is endless!

The importance of timing in brownie cookie recipe
Because the egg and sugar mixture and the chocolate and butter mixture need to sit for specific periods of time, and then the brownie cookies need to go in the oven as soon as they are piped, make sure that you have everything all ready to go. Here is the order that I do things in:
- Prepare your template. I use a circle cutter. Having a prepared baking sheet all ready to go makes things much easier.
- Get the piping bag ready with the tip. You will want this ready to go as soon as you have mixed the brownie batter.
- Melt the chocolate mixture. This needs to stand for 8 minutes, so once you have added the cocoa, set a timer.
- Make the egg and sugar mixture. This needs to whip for a full 4 minutes, so I start whipping once the chocolate mixture is near 4 minutes to go.
- Proceed with the recipe as written.

Tips for perfectly round cookies
I tried making these brownie cookies over and over again with a medium scoop - but I just couldn't get them to be the nice, round cookies I knew that I wanted. The easiest way to do this - use a piping bag! Instead of scooping the mixture onto the pan and then trying to shape it into the right shape, using a piping bag I was able to make myself a template, then pipe perfect circles of batter onto it.
I used a piping bag with a round piping tip - the one that I used was an Ateco 805. You do not want the hole to be too big as the batter is quite loose and will leak out.
If you don't have a piping bag or a round tip you can use a ziploc bag with the corner cut off to form an opening. You could also try carefully spooning the batter onto the paper with a teaspoon or tablespoon!
How to store brownie cookies
Store these brownie cookies in an airtight container either at room temperature or in the fridge depending on how you like to enjoy them. They will keep for a few days.
How to tell when Brownie cookies are done
These brownie cookies only bake for 10 minutes - you do not want to over bake them as you run the risk of them being dry. Bake until the tops of the cookies are set - they will start to crinkle, and the edges are just set. Leave them to cool completely on the baking sheet placed onto a wire rack before removing from the pan.

Tips and Tricks for perfect brownie cookies
I know I have written a ton about these brownie cookies (I am just so excited for you to make them, but here are my top tips for perfect brownie cookies:
- Use room temperature ingredients. If your eggs arent room temperature, they won't whip up well. Cold eggs will also cause the chocolate to cool, and the mixture will be too thick.
- Follow the timing. If you leave the chocolate mixture for too long, it will chill too much and you won't have a good batter consistency.
- Have everything ready to go. This is important. This is a time sensitive recipe, so make sure that you follow the timings and having things prepared first will make this easy.
- Don't over bake your brownie cookies. This can be easy to do but make sure that you don't over bake them, or they won't be perfect and fudgy!

Frequently Asked Questions
What tools and equipment do you use?
You can find a full list of the tools and equipment I use on my products page
Can I make smaller brownie cookies?
I haven't tried but I don't see why not - just make a smaller template on the parchment paper when you pipe out the cookie dough. You will need to make sure that you dial back the baking time on the recipe.
Can brownie cookies be frozen?
I haven't tried it, but the crinkly topping on these brownie cookies does tend to flake a little if you aren't careful, so I don't know how well they would hold their form in the freezer! I think they would freeze ok if you wanted to though - just defrost at room temperature or in the fridge.
Can this recipe be made by hand?
Not really, if you're after that super crinkly brownie top and the fudgy center. The egg and sugar mixture needs to be whipped for a full four minutes, so you either want to use a hand mixer or a stand mixer. I haven't tried to make it by hand but you can try!
Can this recipe be doubled?
Yes - I have it as just making one pan of 8 cookies. I haven't tested baking both pans at once, but you may be able to keep the brownie batter in the piping bag while the first pan bakes.


For more Homemade Cookie Recipes, check out:


❤️ Made this recipe and love it? ❤️
I would LOVE for you to leave me a review and star rating below to let me know how you liked it! Also, please make sure to tag me on Instagram!
Answers to your baking questions
Over the years, many of you have asked me questions about:
- baking in grams
- adjusting oven temperatures
- what kind of salt to use
- and many more!
I've curated and answered them all for your easy reference in this frequently asked questions post!

25 Minute Brownie Cookies
- Author: Erin Clarkson
-
 Prep Time: 15 minutes
 -
Cook Time: 10 minutes
-
Total Time: 25 minutes
-
 Yield: 8 cookies
 -
 Category: Cookies
 -
 Method: Baking
 -
 Cuisine: American
Description
This super easy brownie cookie recipe is all the best parts of a chocolate brownie, but in cookie form - fudgy brownie, crinkly brownie top, and crisp edges. Chocolate brownie cookies come together quickly and bake in only 10 minutes!
Ingredients
- 100g good quality dark chocolate (I used 72%), chopped
- 55g unsalted butter, cold from the fridge is fine
- 12g dutch process cocoa (I used half black cocoa and half dutch process)
- 1 large egg (50g not including shell), at room temperature
- 75g caster sugar (if you are in the US, regular granulated sugar will work fine, see notes)
- 55g brown sugar
- 55g all-purpose flour
- ¼ tsp salt
Instructions
- Preheat the oven to 350°f / 180°c. Line a half sheet pan with parchment paper. Using a 2 ½” (6.3cm) cookie cutter and a pencil, trace 8 circles on a piece of parchment paper (one line of three, one line of two, then one line of three), leaving even spacing between each. Turn the paper over so the pencil side is facing down.
- Fit a piping bag with a medium round piping tip. Alternatively you can use a ziploc bag with the corner cut off, or a size #24 cookie scoop, but piping is the best way to get nice round cookies. Place a clip above the piping tip and another at the end of the piping bag to stop any batter leaking out.
- In a heatproof bowl over a pan of simmering water (make sure the bowl does not touch the water), combine the dark chocolate and butter. Heat, stirring frequently, until the chocolate and butter are melted and the mixture is smooth. Alternatively you can do this step in the microwave - microwave for 30 second increments, stirring well after each until the mixture is smooth and combined.
- Sift the cocoa powder over top of the chocolate and butter mixture and stir until well combined. Leave to stand for 8 minutes. When there is 4 minutes to go, start whipping the egg mixture.
- In a large bowl, combine the egg, granulated sugar, and brown sugar. Mix on medium to high speed with an electric handheld mixer for 4 minutes until the mixture has lightened and increased in volume. This step can also be done in a stand mixer using the whisk attachment.
- Add the chocolate mixture to the sugar and egg mixture and mix to combine with the electric mixer.
- Add the flour and salt and incorporate by hand until the mixture is smooth and does not have any lumps. Transfer the mixture to the piping bag.
- Pipe the mixture onto the parchment paper - you want to hold the tip about 2 cm above the parchment and squeeze until you pipe a dome the diameter of the template that you drew. Finish each one with a little flick of your wrist. Do not worry if you do not get them large enough - you can go back and add more batter once they are all piped out - just pipe it onto the middle of each mound and they will spread out.
- Bake the cookies for 10 minutes, until they are just set, and crinkly on the tops. Do not over bake as they will dry out. Leave to cool completely on the pan (they are quite soft so will need to set) before transferring to a storage container or serving.
- Store leftover brownie cookies in an airtight container at room temperature or in the fridge for up to a week.
Notes
- Can I use salted butter?
Yes - if you don't have unsalted butter that is totally fine - just hold back a little on the salt content in the brownie batter. - Do I have to use caster sugar?
No - you can use regular granulated sugar if you like. In New Zealand, our sugar is much coarser, so I call for caster sugar in the recipe. However if you are in the US or you have finer sugar, regular granulated is fine. Either work great in the recipe, caster just dissolves better when being whipped with the eggs to form that crackly top. Another reason why baking with grams is the best - 200g of sugar is 200g sugar.
Try these cookies frosted with a batch of my brownie frosting!
Keywords: cookies, cookie brownie, brownie cookie
The post 25 Minute Brownie Cookies appeared first on Cloudy Kitchen.


